Pages

Thursday, July 24, 2014

Frozen Painting After the Final Layer


There are two shiny hearts on the painting. "These are for Anna and Elsa.  Elsa is way over here by herself."

"See the swirling winds and snowflakes... "
 And it all started at a rummage sale, just five dollars, and allowing a child's vison of
 "Frozen" to come alive.

Smiles,
Deborah

Friday, July 18, 2014

"Frozen"

On Fridays, my grandchildren stay home with me. I always try to do something special because that is how I want them to remember our time together... all those little special moments.

So here's what we did today.  First, I had purchased this large canvas painting at a rummage sale for only $5.00 with a special activity in mind.
Next, I showed a five year old and a soon to be eight year old how to use a spray paint can. Yikes!

Now, we are ready to be creative!!
With music from "Frozen" playing
 the creativity flowed.....
and here is the almost finished painting.
That's all for today. 
Smiles,
Deborah


Wednesday, July 9, 2014

Skirting the Issue


It's not quite back to school time yet, but that's the first thought that came to my head when asked to participate in Skirting the Issue.  I'd love to have every child walk into school on that first day feeling special.

So I wanted to share a skirt with you that would be appropriate for girls from ages 4- 12.
This skirt idea was originally created by liz at Simple Simon and Company. My personal twist is the way in which I constructed the skirt. I'll show you what I mean as I share these step-by-step instructions. I love this skirt design idea, because a different color ribbon and shirt and you have a totally different look.
Add a sweater or a long sleeve knit shirt, and this skirt looks great in the fall too.
I bought a plain white sweater at the resell shop and added a layer of knit fabric to the front of the sweater.
 
Now, how to make this skirt.

1.  First, cut a rectangle piece of fabric with a width that is twice the child's waist. (For the cotton poplin zebra fabric,  I used the entire width of fabric which was a bit wider. For the mustache knit fabric,  I used 3 times the waist.)  The length of the rectangle is from the child's waist to just above the knee plus 3 inches for the hem and 1 1/2 inches for the elastic casing at the waist.
2. Next. cut a piece of 6 inch fusible light weight or medium weight interfacing the width of the fabric. ( For the knit fabric, I used a knit interfacing.) Apply with an iron to the bottom of the skirt. Turn the bottom edge under one-fourth inch and stitch it down to finish the edge.


WHY THE INTERFACING??? This is the area where all the buttonholes will be made and 2 layers of fabric plus two layers of interfacing will make sewing the buttonholes easier, support the weight of the ribbon when it is threaded through the buttonholes, and provide some extra "pouf power."


3. Next, turn up the bottom hem just a bit more than 3 inches, press,  and hem. You won't need to measure, as the interfacing edge will serve as a guide to turn the fabric up just past the interfacing. On one skirt, I used the blind hem stitch to hem the skirt. On the other two skirts, I hand stitched the hem with a slipstitch.


3.   Next, I made the casing for the elastic waistband across the top.
Finish the edge by turning under the fabric one-fourth inch and stitching.  Then,  knowing I was going to use a 3/4 inch elastic, I turned down the casing another 1 1/4 inch and sewed right next to the hem edge.  At the top of the casing, I sewed a 1/2 inch line of stitching to finish the top edge with that "Paperbag Look." 


So you can see from this photo that I have finished both edges of my rectangle.
4. One inch from the bottom of the skirt, I made a series of Paired Buttonholes to thread the different ribbons through at the bottom of the skirt.
There is NO MATH involved in deciding where 
the buttonholes will be placed

... JUST Divide By Folding
The arrows show the placement of the buttonholes in the hem area.


The pins indicate where the  mid-space between the two buttonholes is located. Each set of buttonhole pairs are around 5 inches apart.


Then, I made a template with a post-it note to stick at the edge of the hem to mark where the finished set of two buttonholes will go.
  No more measuring and they will all be the same!


5. The length of your buttonhole is determined by the width of the ribbon you want to use in your skirt. I used 1 1/2 inches long. Use "Fray Check" to seal the buttonholes and the ribbon ends before cutting them open.  Cut buttonholes.


6. Thread the waist elastic through the casing and secure with a pin. Sew the side seam with a 1/2 inch seam, sewing through the elastic and all the way to the top of the skirt. 
*NOTE TO SEWER: When I sewed the knit skirt, I added extra seam allowance area. The knit fabric "curled" and I wanted to place pins on both sides of the seam to sew a straight seam.  This made the process easy-peasy. Zig-zag on the inside of the seam, and trim.


7. Thread the ribbon through the buttonholes, cut the ends  diagonally through the fray check soaked area and tie into a bow.
On this photo, I wanted to show you that I didn't tie a bow for the Fifth Grader because I thought it looked more appropriate for her age.


8. Smile, it looks fabulous doesn't it, and so will yours. Leave me a comment about how your skirt turned out...I'll be waiting to hear from you. If you have any questions, post your questions in the comment section. Remember all kids are different, but they all want to feel special, so join the movement and make a skirt for someone.  Giving to others feels better than I can describe.

Deborah

Saturday, July 5, 2014

Bolster Pillows for the Windowseat

To make the  bolster pillows for my windowseat, this is what I did:
1. Purchased these toddler/ small child body pillows from Carson's flash Internet sale for $19.00.
ANNE GEDDES® Cotton Body Pillow     
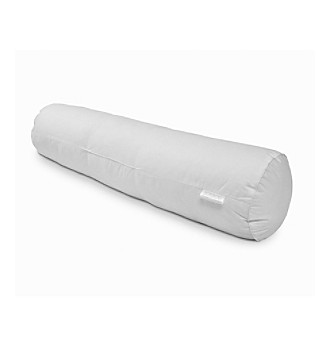
Size:  8 inches by 32 inches, cotton fabric, filled with polyester     puff ball fiber. Excellent quality.
2.  Calculate the measurements for my pattern to cut out the fabric.
For the width of the rectangle to cover the middle of the pillow measure the distance around the pillow ends (circumference),   Use the diameter (8) times 3.14 (Pi), or use this online calculator , Plus 1" for seam allowances. 8 X 3.14 = 25.12 plus 1 inch seam allowance = 26 1/8 inches wide.
For the length of the rectangle to cover the middle of the pillow measure the pillow form from one end to the other end (32 inches) and add 1 inch for the seam allowance.  SO I will cut a a rectangle 26 1/8 inches wide and 33 inches long.

3. For the ends of the pillow cut out 2 circles 8 inch diameter plus 1 inch seam allowance = 9 inches. Look around your house for a circle that size... I used a 9 inch cake pan.

4. Make your piping. I used a 6/32 cotton piping cord, I cut my strips of fabric on the bias.  I wanted a finished seam allowance of 1/2 when I was finished making the piping.
This is the most important part... I purchased a piping foot for my sewing machine and it made the job SOOOO much easier. This  foot cost around $15.00. 
There are two groves on the underside of the foot and the piping glides in the grove.


Look at how close to the cotton piping it sews the seam. 

4. To attach the piping to the right side of the circle, 
seam rip about one and a half inch of the seam on the piping and open up the piping. Cut away some of the cotton piping and fold back the edge of the fabric. Begin sewing on the piping at the stitching line, and NOT at the end.
Next, when you come to where the piping will overlap, cut the end of the piping so it fits right next to the cut off cotton piping.Insert the end so it touches the cotton piping.
Fold over the fabric piping end and continue sewing.


4. Sew the piping (Using the piping foot) to the right side of the circle fabric  using a 1/2" seam allowance. Overlap the piping as shown above.  Clip the seam allowance of the piping seam allowance. Even though it is cut on the bias, clipping the tape will allow piping tape to lay smoothly on the circle. 
5. The Body of the Pillow - Using the rectangle for the body of the pillow
  • Match the edges that are the length of the pillow plus 1"
  • Sew the seam, leaving an opening in the seam in the middle.   
  • Press the seam flat to set the stitches and then press open the seam.
Working with the tube of fabric that is right sides inside...
  • Bringing right sides together and pin the piped circle in place on the end of the tube of fabric by dividing the circle into fourths with pins, and dividing the tube into fourths and then matching the fourths to ease the circle into the tube.
  • Repeat for the other end of the tube.
  • Sew the piped circles to ends of the tube of fabric.
  • Turn the pillow cover right side out.
  • Press and insert the pillow form inside the pillow cover.
  • Though this isn't the circle, I wanted to show you how easy the piping is to sew when placing the two fabrics together, using the piping foot.
  • Hand sew the opening closed with a slip stitch.


    Related Posts Plugin for WordPress, Blogger...