Pages

Showing posts with label Sewing Lessons with Miss E and Grandma. Show all posts

Thursday, May 21, 2015

Girlie-Girl Ruffled Top and Skirt

Girlie-Girl
Adjective: Adding ruffles, lace, ribbon, tulle, soft colors, and combining those elements for a feminine feel

Adapted Summer Chevron Shirt into
Girlie Girl Ruffled Top, Skirt, and Headband


Rick rack over back yoke seam with fabric loops slit opening


This is my third submission to the May Challenge at Project Run and Play.
(I just couldn't help myself as ideas just kept running though my head  of ways to adapt this pattern.)  
When I made the Stripes and Flounces shirt, I created changes in the original pattern that kept the center front of the shirt flat, but added flared out flounces in the back and front sides.  So I used this same idea, but left the rounded cut-outs flat and filled them with ruffles on both the side front and lower back of the shirt.
Light Pink Tulle
Toile Print Ribbon  
Eyelet Lace
Rosebud Gauze Fabric
White Batiste with ribbons,rickrack, and tucks 
gently rounded side front cut-out


This shirt is completely lined with a soft white knit fabric from Riley Blake.  Why?  My granddaughter has super sensitive skin issues (eczema) and I knew that all those ruffle layers rubbing her skin would not be comfortable for her.

 The last ruffle on the shirt goes completely around the shirt and is attached to the knit lining.

 The top of the skirt, that touches Miss C's waist, is made from this soft knit also.  I've learned that when you sew a garment for someone you must consider both
 the beauty of the design and the comfort of the feel.

And lastly... add a bit of frosting to the outfit.


Smiles,
Deborah 
P. S.   The sewing lesson with Miss E and Me on Friday will be about adding a gathered ruffle.

Friday, May 15, 2015

Sewing with Miss E and Me: Patch Pockets

Here's our Friday Sewing Lesson with Miss E and Me.

Here is an easy way for a beginner sewer to make patch pockets.
The ruler is in the photo to show you that the first pocket is laying on top of the fabric.
 1. Cut out one pocket. To cut out another pocket exactly the same, lay the first pocket on top of the fabric and match the pattern. Pin, and cut out.
 2. Pin the pockets on a piece of lining fabric.
 Sew all around the pocket using a 1/4 inch seam.
 Now, cut out the pocket and lining material.


3. Cut a small slit in the lining fabric only.

 4. Turn the pocket gently right side out through the slit. Press the pocket. Next get out some Wonder Under.

 5.  Place the Wonder Under inside the pocket through the slit.  Make sure the slit edges are close together, and then iron to melt the Wonder Under and seam the slit closed.

6.  Topstitch any decorative stitching on the pocket, and then pin to garment.  Sew around 3 edges of the pocket, back-stitching at the beginning and end of the pocket. 

Smiles,
Miss E and Me

Monday, May 4, 2015

Sewing Lesson: Pop Quiz

Last Friday, Miss E learned one way to press seam allowances. 
 So I thought she should have a little 
POP QUIZ !!!

With her winnings from Project Run and Play, we worked with Riley Blake fabrics to order this
Wiltshire Daisy Doll panel to make this darling American Girl Doll outfit.  In addition, we ordered some of the matching fabric to make a dress for Miss E too.

So on to the POP QUIZ!  I asked Miss E to come up to the sewing room.  I had sewn the shoulder seams on the top and I asked her to show me how to press that seam.

1. Press the seam flat on the wrong side to set the stitches.


2. Use your fingers to open the seam and press it down with your fingers.


 3.  Press the seam open with steam in your iron on the wrong side of the fabric. Up and down----
not slide side to side.

 4. Let it cool, then flip the fabric over so you can see the outside of your fabric.
 5.  Press right on the seam one more time.
A++++  Work

Why the Pop Quiz? 
 Well, as a teacher, I know that research says that it takes multiple exposures or experiences to learn a new concept. So I'm trying to provide Miss E with those same multiple exposures while learning to sew.  This quick little lesson reinforced what she knew, and provided a chance for her to describe in words the same process again...
those important multiple exposures.

Smiles,
Deborah


Friday, May 1, 2015

Sewing Lessons with Miss E and Me: Pressing as You Sew


Look, my Mom bought me my very own iron to use while I sew!
 
It's just my size because it fits my hand and that lets me control the iron easily. It steams too.


When I was excited about using it, my Grandma just smiled, and said that most females aren't so excited about receiving an iron.  I wonder why?

Oh well, irons make a humungous difference !!!!!
You need to press your seams open 
as you sew
Check out this experiment:
First,  I sewed a seam, then went onto the next step, and sewed another piece of fabric across one end without doing any pressing.

 Then when I was all done, I tried to press it flat
 because it looked so messy.
In the picture, the pin is pointing to the little creases that formed when I pressed it from the right side of the material.
 It's not terrible, but it's not the best either.
Part 2 
First, I pressed the stitches flat on the wrong side of the fabric.
My Grandma says that this will set your stitches into your fabric and smooth the seam. 
 
Using your fingers, open the seam and finger press it a bit.
Be careful, because your fabric is warm.
Then,  get ready to press the seams open with your iron.


Don't press over pins or basting stitches. You could melt the plastic heads of your pins or scratch the bottom of your iron. The pressed basting stitches can leave an impression in your material that is hard to iron out later.
Mostly press your fabric on the wrong side of the material.


    Now, turn your fabric over and 
    press the seam on the right side.
     
    Doesn't this look nice?
    Look at the seam where the pin is pointing...no little tuck, just flat and smooth.
    I hope our experiment helped you see why it is important to press your seams as you sew and not wait to the end when you are finished.

    Smiles.
    Miss E and Me

    P.S. Next Friday we will be looking at pressing curved seams...see you then.


Friday, April 24, 2015

Sewing Lessons with Miss E and Me: Making Patterns


When my grandmother makes a pattern or adapts a pattern, she used this material:

Pellon Tru Grid Tracing Material

She just adapted a sling bag pattern and I saw her use it to make her pattern.

She says she likes it because of the 1 inch printed grid on the see through non-woven fabric. The grid makes it easy to cut a pattern that is on the straight of grain and is the correct measurement.
All that talk about "straight of grain" reminded me of when we made a weaving in art class. 

When you put your fabric pieces on the fabric, you need to measure from an arrow on the pattern to the edge of the fabric so your pattern will be straight on one of the threads that are woven together to make the material. 
Threads Magazine has this article that tells you more about that with great pictures: http://www.threadsmagazine.com/item/4968/pattern-layouts

She even tries out her patterns on me before cutting them out sometimes because the see through material can be sewn or basted like real material. 

It's like trying on a really weird see through dress.... (and I won't share of picture of that with you .)

But here's another "weird picture" of me


Smiles,
Miss E and Me


Friday, April 17, 2015

Sewing Lessons with Miss E and Me: Turning Corners


 When my Grandma explained "pivoting" to me, I just didn't get it.  But, when she explained a "ballerina twirl," I understood exactly what she meant.  
 In sewing, it is important to place your needle down 
into the fabric exactly on the corner so when you turn
 or "ballerina twirl," the edge of your fabric will then be lined up to sew again using the same seam allowance. 


In the past, Grandma helped me to sew straight seams and to know where to stop sewing when turning a corner by marking the seam  allowances with a water-soluble blue marking pen on the fabric.  She said that I need to train my eye to recognize different amounts 
like 1/4, 3/8, 4/8 or 1/2, and 5/8.  
So by marking the seam allowance, she was helping me to learn how far away from the edge of the fabric 5/8 of an inch looks like.  

Another way she sometimes helps me is to place a dot with the blue pen, exactly where I should stop and ballerina twirl.

We've been doing some more practice by sewing, with NO thread, on paper.  I pretend that the paper is the fabric and Grandma tells me how big the seam allowance needs to be.  It's really a kind of fun game to play together. She checks me with this little ruler she has, and I get one point if I'm right. If I'm not right...Grandma gets one point. 
 First person to ten points is the winner. 
Learning new things take practice.


It takes practice to sew straight seams and turn corners at just the right spot, but once you get it.... then you feel so much more confident about sewing. 


 So if you worry that 
your seams aren't straight enough or that your corners aren't quite right, mark your seam allowance like my grandma does or practice on paper.
Smiles,

Miss E and Me


Thursday, April 9, 2015

Sewing Lessons with Miss E and Me: Sewing Elastic Together

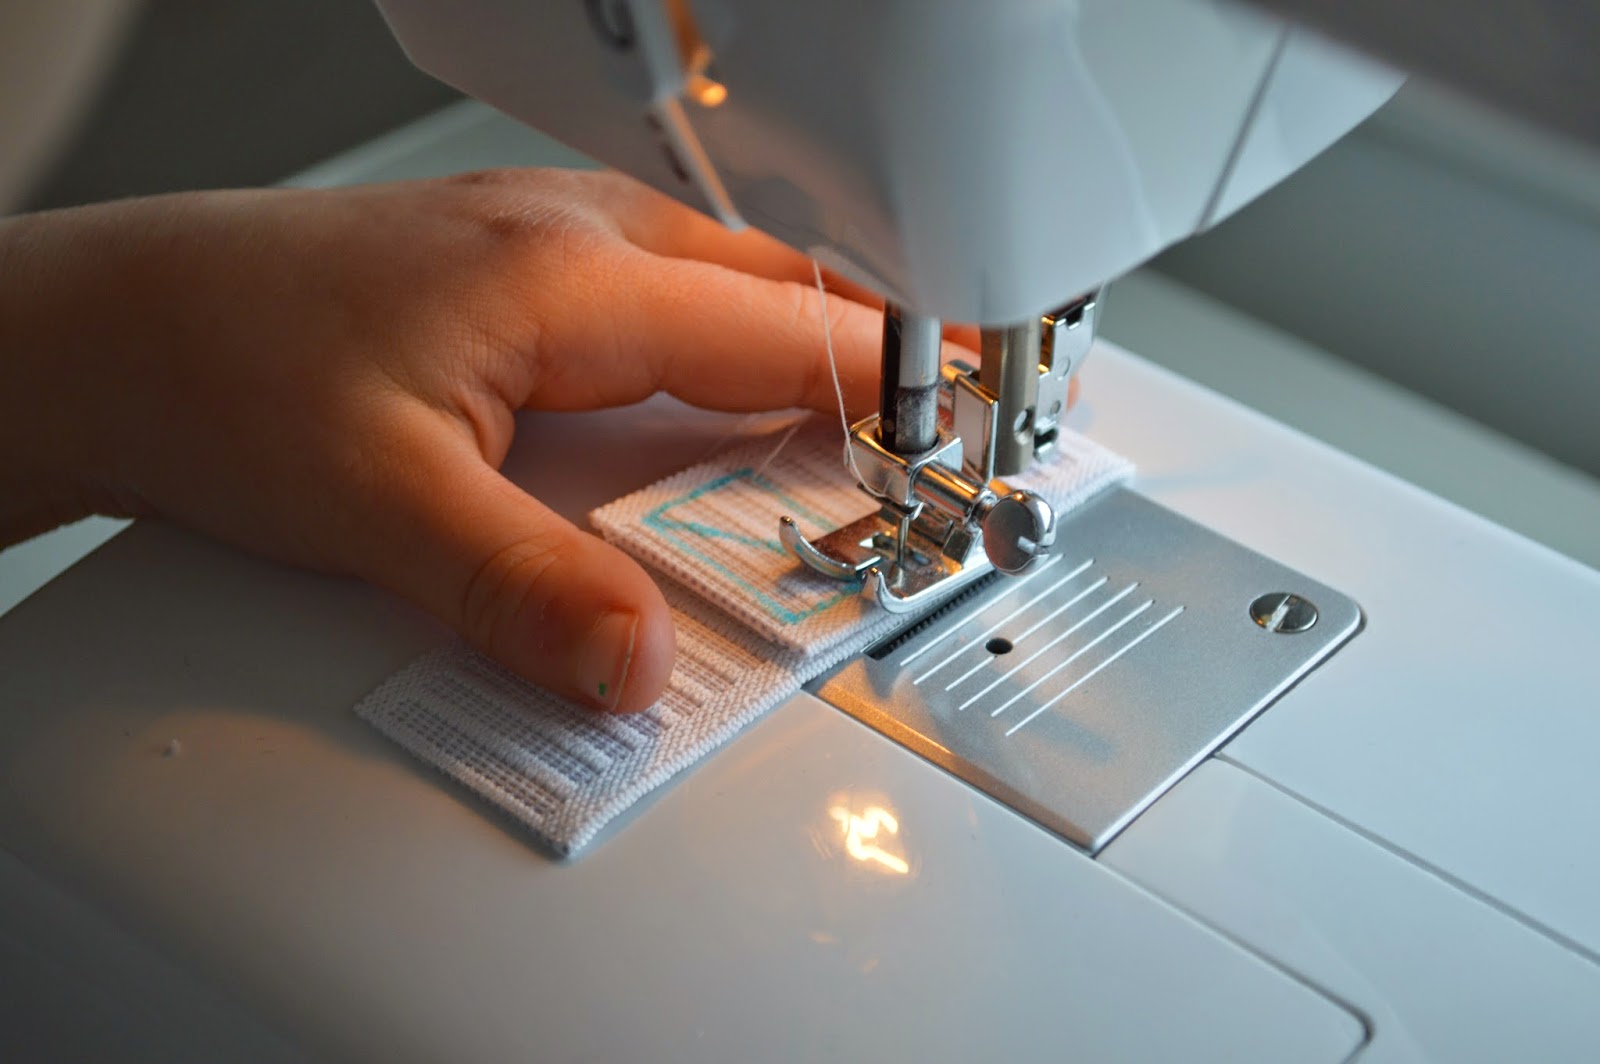
I'm going to make Papa a pair of work-out pants out of a cotton knit fabric. The pants will have an elastic waistband, so my grandma and I had a little lesson about sewing the ends of elastic together so they are comfortable and will stay together.

First, I sewed 2 pieces of elastic together the way I sew two pieces of fabric togther.

It seemed strong enough. But when I felt the BUMPY side against my skin,

I didn't like how it felt at all.  
Who wants a bump in the top of your pants when you wear them?
Then my grandma said this is 
NOT HOW TO sew the elastic together.  

The second examples uses a piece of lightweight fabric. The two ends of the elastic placed on top of the fabric and directly next to each other, but not overlapping. Two of the  rows of zigzag hold the elastic to the base fabric, and the center row of stitching zigzags the two pieces into one. Lastly, you trim the base fabric to the size of the elastic.
2 rows of zigzags to each side and a wider zigzag in the middle


Cutting off the extra material.

All finished, on the back
 The third example overlaps the elastic and has a box with either an X or 1 diagonal line in the box. This application will take a lot of stress and will not come apart easily. It lays flat inside the casing and has a slight thickness where it overlaps. 

"I pulled and pulled on this one and it was very strong." said Miss E.  "But you still have a bump inside your pants."


So after this experiment, which one do I want to use inside Papa's workout pants?


There are two ways that work, but...
 I like this one the BEST!
This is the one I want to use in my Papa's pants.

Next Friday, I'm going to tell you about ways that my Grandma is helping me to sew straight seams and turn corners. See you then.

Smiles,
Miss E and Grandma
Related Posts Plugin for WordPress, Blogger...