Pages

Sunday, March 7, 2021

Honey Yellow Bee Hoodie and Shorts


I can see why one of the Pantone colors of the year is a bright sunny yellow.  It's one of those colors that reminds you of growing things and summer.  

So when I saw this labeled parts of a bee panel, I just had to buy it to make a fun summer outfit for my grandson.


When I began to lay out my pattern, I knew that I wanted the labeled bee to be the focus of my garment. Positioning the bee drawing can be a little tricky, as I wanted the bee illustration to be in a particular spot in the finished garment. To achieve that , I cut my pattern piece out of a semi-transparent tracing fabric so I could lay it on top of the panel and see it's position. I know this seems like a lot of extra work, but it has saved me so many times from making a cutting error, that I think it is worth it. 

 In order to get most of the labels to fit, I ended up having to widen the front piece. If I didn't widen it, even part of the wing would have been cut off. 
I added a pocket to this curved section of the top. 
Adding details to garments makes them special.  On the waistband, I added an applique of a bee hive.
Using my sewing machine straight stitch, I tried to create a bee flight pattern of the two hearts. At the end of the flight pattern,I stitched on a larger bee that was printed in the selvage edge of my fabric.  


This is the back of the knee-length shorts I made to go along with the shirt.  My grandson loves comfortable elastic waist shorts. 

 I like this design because of deep pockets that are just right to store those valuable finds (like shiny rocks) children seem to find while playing outside.

Smiles,
Deborah

Sunday, February 28, 2021

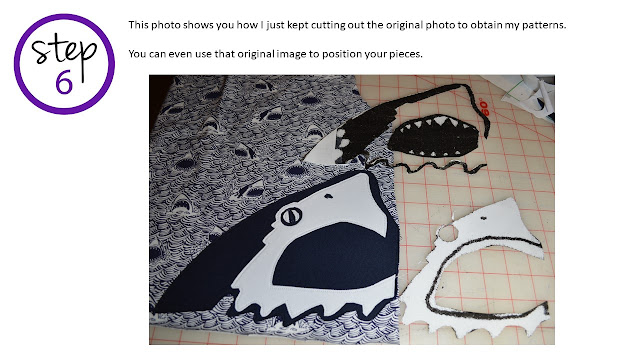
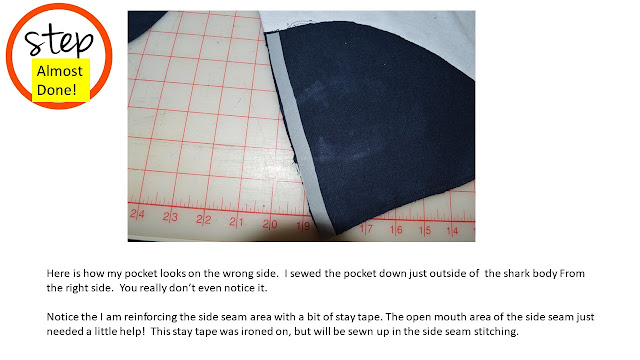
How to Create a Shark Pocket on a Garment


Here is the finished shirt

I really like how the shark mouth pocket opens up when sewn into the garment.

I added another detail on the waistband,


 If you want to be notified of my new blog posts in your email, just sign up on the sidebar of this blog under "Follow By Email."

I hope this will help you create 
your own special pocket!

Deborah

Update: 3/11/21
Lynn Hordal Fortier decided to try to make the shark pocket using this tutorial and here are her fabulous results:

Her grandson is going to LOVE IT!

Tuesday, January 19, 2021

Hipster Bunny Top and Paper-Bag Pants

This hipster bunny was just waiting in my fabric stash to be a "something special" outfit. 


I have been experimenting with the "Story" pattern from the Project Run and Play collection.  This time I again created the color blocked front yoke on the top front.  The placement of the yoke allows me to center the hipster bunny in just the right place. 

 I love the little cap sleeve I used, instead of the long sleeve.

The pattern does feature a sweet little curved neckline that I quite like!  My granddaughter does not like hoods, and so many patterns now days feature hoods instead of a curved neckline.

I used my coverstitch sewing machine to sew two lines of topstitching. This topstitching keeps the neckline flat and is a fun design element too. As you can see, I reduced the width of the neckline ribbing a lot. I wanted just a hint of the aqua blue....


I hemmed the shirt instead of using a rib band at the bottom, because I wanted it to be tucked into the waist of the coordinating paper bag pants.


These comfortable pants feature elastic at the waist and hemline.  Easy on and so comfortable to wear in this cotton/spandex knit fabric. 

I centered a bunny on each of the back pockets.

These long narrow pockets in the front add just the right amount of punch.  I banded the pockets with thin strips of the XXX fabric. 

I hope you enjoyed see my "One of a Kind" creation.

Smiles,

Deborah

Saturday, January 16, 2021

Valentine Shirt with a Hidden Surprise

This top started with "The Story" pattern from the 

Project Run and Play Library.


 I hacked the pattern slightly by color-blocking the
 shirt front and creating a yoke.
Next, I removed the gathering at the top of the sleeve seam and kept the gathering at the lower cuff area on the sleeve. 
I like how the sleeve gently billowed out at the cuff.
Lastly, I decreased the width of the neck binding.
 
To personalize this Valentine shirt for my granddaughter
I embroidered the individual letters
of her name onto some of the hearts in the jar.

I think I am not going to mention it to her and
see if she notices what I've done
all on her own.  
Smiles,
Deborah

Tuesday, January 12, 2021

A Comfortable Trio of Garments for a Be-you-ti-ful Girl

I created a coordinated outfit out of soft bamboo and cotton knit for my

 be-you-ti-ful granddaughter.

 It's so soft and fluid that I know she will enjoy wearing it.


The first shirt that I made for her has long sleeves
that feature soft, floaty, romantic, and comfortable half bishop sleeves.
Notice how the fabric is gathered to the top of the sleeve and billows out, then is gathered again at the cuff.


This pattern is from a collection of patterns featured on 
Project Run and Play
called the

Project Lounge Library Capsule.

This particular pattern is the "Story." 

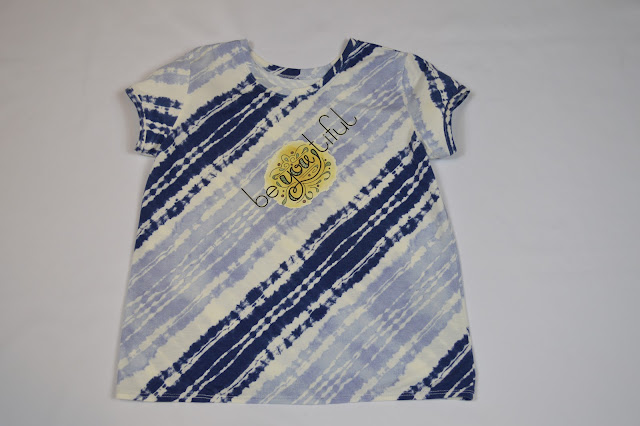
The second shirt was drafted from the Story pattern also. I changed the sleeves into a short cap  sleeve.


 Isn't it amazing how different a pattern can look when you just change

the style of sleeves.  Another change I made was to decrease the width of the

 neck binding to 1 3/4 inch.  The design of the fabric provided the opportunity

to use a vinyl iron-on decal to add a bit of personality to the garment.

Lastly, I made some comfortable jogger pants with a paper-bag

elastic waistline. The added waistline tie added even more to the design.


Of course, this outfit was 

"made with love."

Related Posts Plugin for WordPress, Blogger...