Pages

Tuesday, October 1, 2013

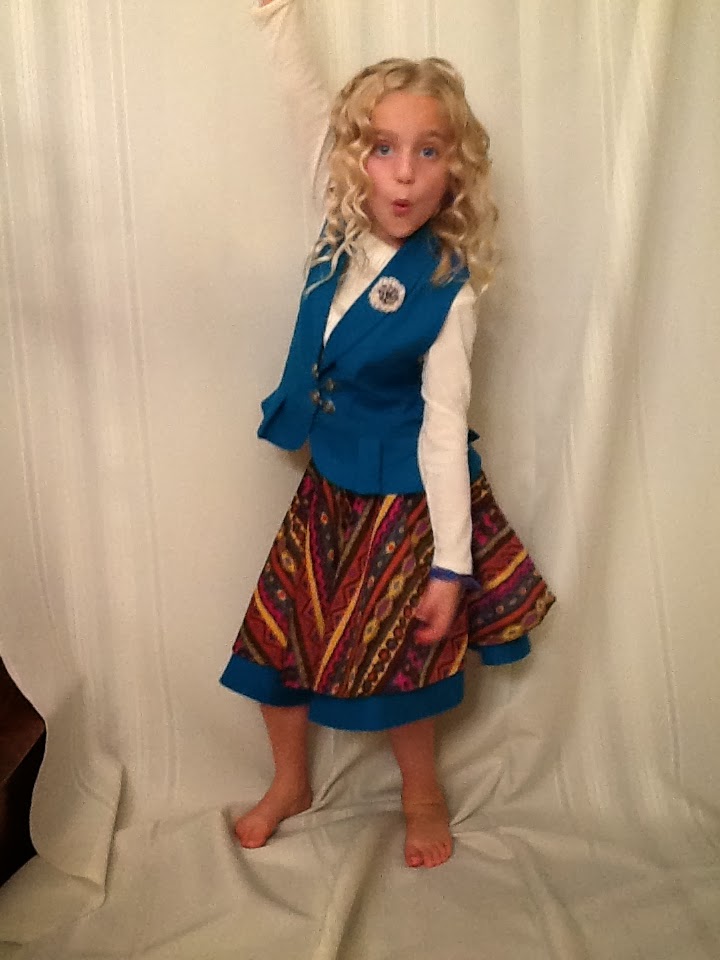
Updated Handcrafted Ethnic


Don't you love to weave together all the parts of a
 finely created design?
 
 
That describes me.
 
I love to weave all the elements of  the finished project in my head.
 
First, I plan the overall theme.
Today's theme is Updated Handcrafted Ethnic. 


Next, I think about just the right color and pattern to suit the theme and the wearer of the finished project.
 
 
So the process begins... first the handcrafted. I made this lace and fabric insert for the blouse.


 Adding a knit lining behind the bodice.
The completed bodice front.


Next the color...
I wanted this outfit to feature autumn colors- brown, gold, teal, forest green, pink (that bright pink that sugar maple leaves turn in the fall), and a creamy white to blend all the colors together.

PATTERN....
Pattern is so important to ethnic designs. I love the freedom that ethnic designs have to mix patterns. What fun it was to add these accessories to the mix.
A bit of lace and a sparkly button pin that I made to go on the vest
 
A different kind of button latch


The secret ingredient...HIDDEN SPARKLE!
Adding a band of color to the sparkle underskirtGold embroidery thread was used with a double ladder stitch to attach the color band to the bottom of the underskirt. After sewing the excess fabric was cut off next to the stitching to create a smooth finish. I sewed an underskirt that can be added to the outfit out of shiny gold flecked fabric and edged the circle skirt with a band of teal.


And now a look at my creation that I created in my head...
and worn by my favorite rock star!
"What should I sing?"


The individual pieces:


 My first time ever sewing on a sweater knit.

I hope you enjoyed viewing my personal style...
Deborah


Tuesday, September 24, 2013

Braid Variation

  I thought my granddaughter's hair turned out quite nice today.


Saturday, September 21, 2013

Remake of Papa's Plaid Sweater

This is all that is left of Papa's sweater
Good bye Perry Ellis sweater...
 
He gladly let my Grandma use it to make this
racer back vest and leggings for me.
Hello, Sassy Little BBC Racer back Vest
by ShwinDesigns
 with a little remake by Grandma Deborah


Grandma bought these yoga shorts for only $3 at a summer clearance. Look what she did with them!!!!!
A gathered skirt made out of featherweight wool.
This fabric raveled and Grandma finished some edges with bias seam tape.


Grandma also made a soft, bright, red t-shirt to contrast with the black and white fabric.
 
 
Smiles from:
Miss C and her Grandma

Sunday, September 15, 2013

Bubblegum Inspired Outfit

My candy inspiration for the second sewing challenge from
 Project Run and Play  is

 
My first design inspiration as I thought about bubblegum was
 the delicious pink color of bubblegum.
 

Of course, who could think about bubblegum without envisioning blowing huge bubbles....
until they burst all over your face.
Girl with bubble gum bubble bursting against her face
 
So I began my hunt for bubblegum pink fabric with bubbles... and here is what I found:
 
  Fleece that is soft,
warm, and just right for a little girl that likes to wear dresses in our cold Northern Illinois winters.


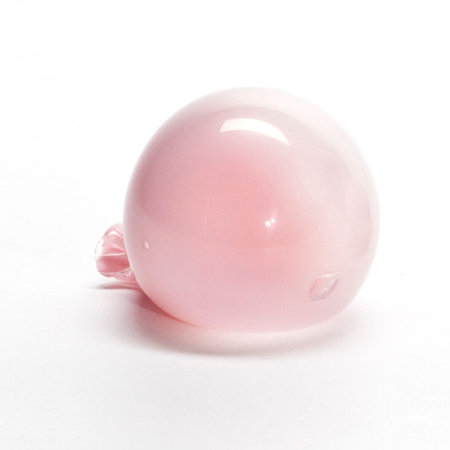
Remember twirling the end of your blown bubblegum bubble to save them?
Bubble Gum Paperweight
 Well Miss C loves twirling in her new bubblegum dress.
 This jumper features a twirly, swirly skirt.


Though I love the soft bubblegum color of the fabric, I provided some contrast to the design when I chose to use a soft grey shade as a contrast.


 The first contrast comes from the blanket stitched edges around the neck edge and built in belt. The grey long sleeved t-shirt is made from a soft organic cotton knit fabric...so soft. I found that the construction went quite quickly. I even reread an old Stretch and Sew book from years ago to calculate the length of the 
self-ribbing at the neck edge.

Miss C holding her bubblegum roll, and showing off some of her ballet moves.


  Fleece does not ravel; therefore, there is no need for a seam finish or edge finish.  I decided to use my sewing machine blanket stitch to quickly sew the bodice and facing together in one quick step.  Sew and trim... that's all there is to it!
 
To highlight the lower waist, I added a grey belt dotted with pink mini-dot and darker grey buttons. The belt is topstitched with a machine blanket stitch too.
 
The hat is the final touch to the perfect bubblegum inspired creation.

I created the hat by searching on the internet for some basic instructions, and then just having a go at it! I found that I needed to add some elastic inside the band since fleece doesn't have any stretch. Miss C told me that she really likes the hat because it makes her feel "fancy."


...And that my friends is my candy inspired outfit.
Deborah


Tuesday, September 10, 2013

Striped and Solid Knit Pullover Top

Hurrah! It's time to be a part of Project Run and Play Season 7. 
My granddaughter has grown so much this summer that she really needs some new clothes for the upcoming school year.


I love this soft fabric.
 
 
The first challenge is a remake of Oliver + S's Popover Sundress.
 
Here are some of the changes that I made to the basic sundress:


  1. I used a soft cotton knit striped fabric and a knit waffled French terry fabric for the outfit.
  2. I shortened the bodice front and back to make this pullover top.
  3. I added two inches width to both the front and back bodice at the "Place on fold" to add fullness so I could gather the bodice to the front band.
  4. I interfaced one half of the front band and then topstitched the band to give it more shape and strength.
  5. I used the bright yellow stripe to create a piping that I inserted in the bottom of the front and back band.
  6. I cut the widened bodice into 2 pieces ( five inches from the bottom) and  inserted a very full gathered ruffle into the seam when I sewed them back together.  This gave the longer top more body and swing.
  7. I also made striped leggings, a striped t-shirt with a gore of solid French terry knit inserted into the back of the t-shirt. and solid pants with back striped pockets to coordinate with the top.
Comfort is the most important factor in whether or not my granddaughter will wear the outfits that I sew for her... and this outfit is comfortable!
 
Details are what makes an outfit special... and this outfit has details-gores, topstitched seams, decorative pockets, ruffles, and piping.
 
Making both solid and striped pants added variety to the outfits that can be created.
 
Lastly, creating different layers will be important in our cold Chicago winters. T-Shirt + Pullover tunic top + pants = warmth.
Deborah


Wednesday, August 7, 2013

Learning How to Sew at 7 Years Old

She's only 7 years old... but she's so interested in learning how to sew. So, I'm jumping at the opportunity and plunging into working with  my granddaughter on some basic sewing skills.


For Christmas, I bought her a basic sewing machine for around $200.00. I didn't want to frustrate both of us by purchasing a small "toy sewing machine." Her sewing machine is situated on a small table right next to mine. It basically does straight stitching, zig-zag,  and a buttonhole.

We've done our share of drawing a line on a scrape of fabric and having her practice control and speed.  If you visited my craft room during a lesson, you would hear: "Down needle on the line, down foot and get ready to focus, and begin."  "Smooth speed... gosh you're doing great!"

I choose projects carefully that will be successful. E is sewing her first dress. It's one of those panels you purchase with the elastic top portion. It features Minnie Mouse.


 This pre-printed panel dress will be worn at Disney World soon. We've been saving for 2 1/2 years for this trip, and it's almost here.  Making this dress to wear on our special vacation makes it even more important.

Related Posts Plugin for WordPress, Blogger...